
Palo Alto HA Configuration Part 2: Active-Active HA Mode
- March 27, 2024
- Posted by: Lyfey Technologies
- Categories: Firewalls, Networking
In our last article, we introduced the concept of High Availability(HA) on Palo Alto Firewalls. Check out the article from this link: Palo Alto Active- Passive HA Mode Configuration
In this article, we demonstrate how to configure HA in Active-Active mode.
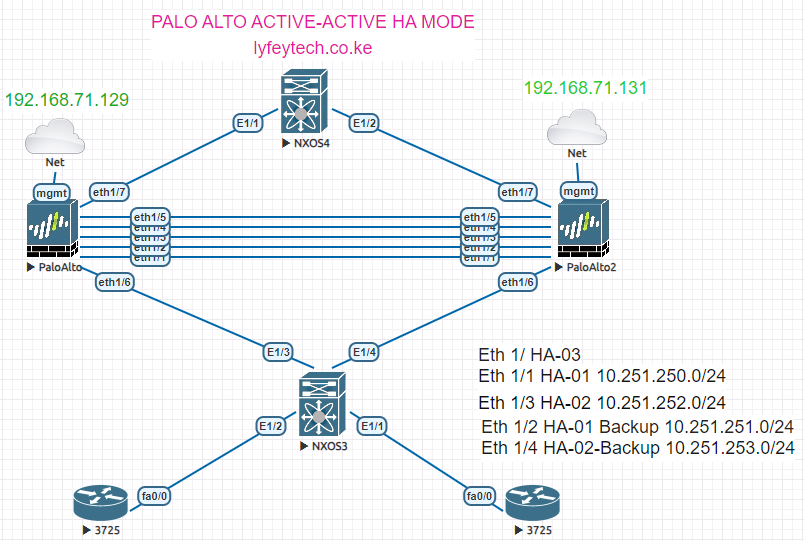
Step 1: Connect the HA interfaces between the two Palo Alto firewalls as shown in the topology
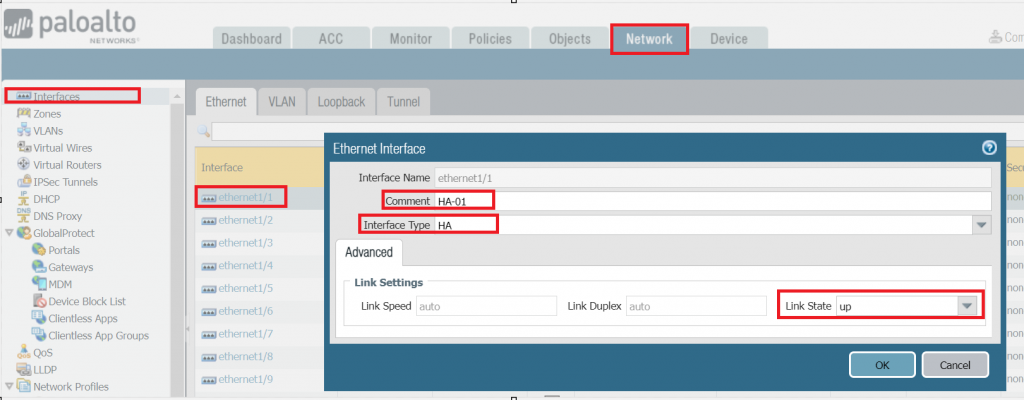
Step 2: Configure interfaces Ethernet 1 through 5 as the HA interfaces and change link state to up. Give comments accordingly.
Go to Network>>Interfaces>Ethernet x/x and configure as shown below. Repeat the procedure for the five HA interfaces on FW1 and FW02.
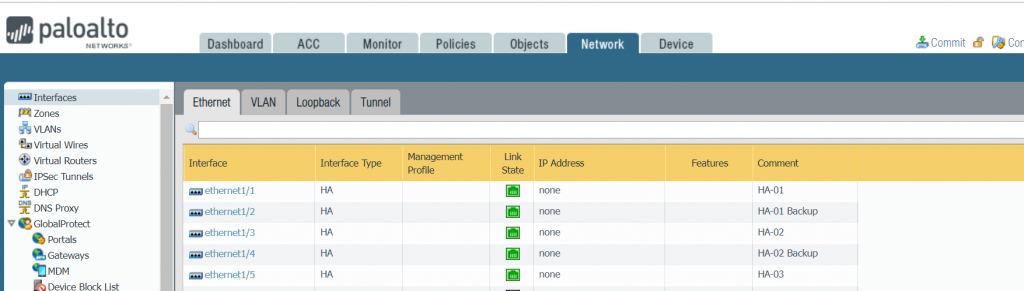
Verify the status of the interfaces on both Firewalls. As shown below, the five ports are assigned as HA ports and are Up on both Firewalls.
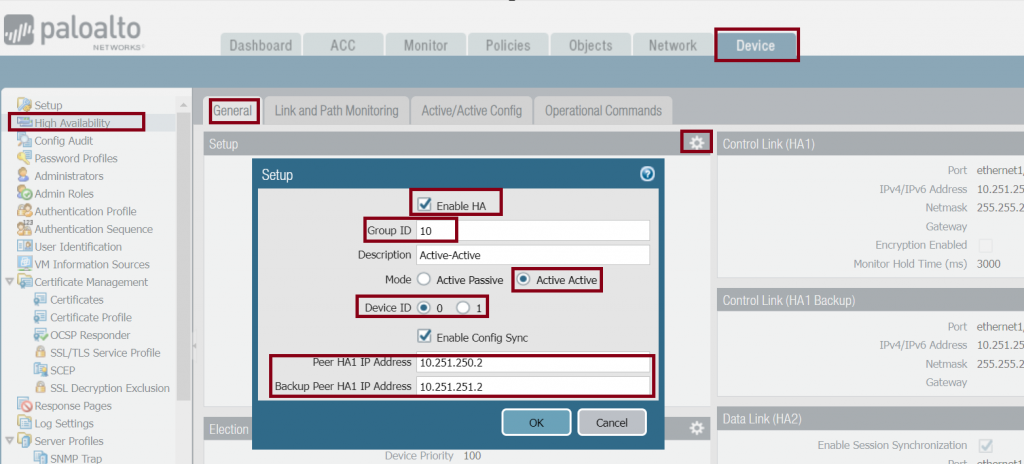
Step 3: Enable HA on the two Firewalls. Go to device>>High Availabilty>>General>>Setup and click on the settings button. Configure as shown below on FW01 and FW02. Note: The same Group ID should be configured on both FWs.
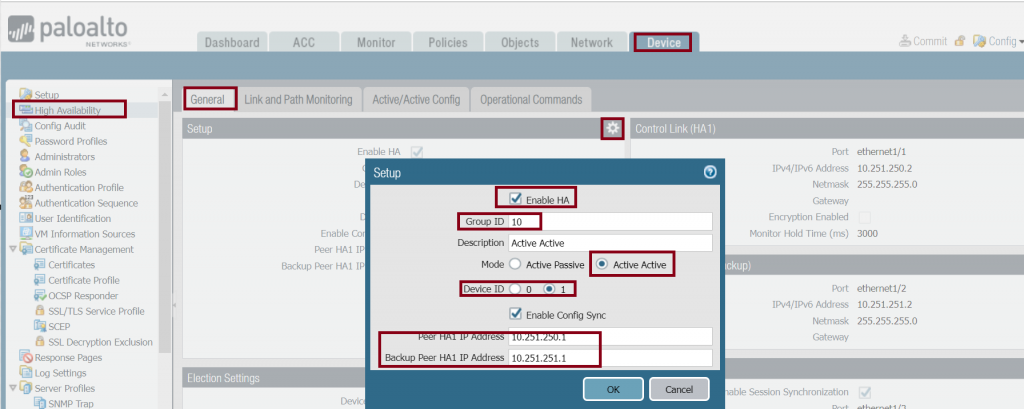
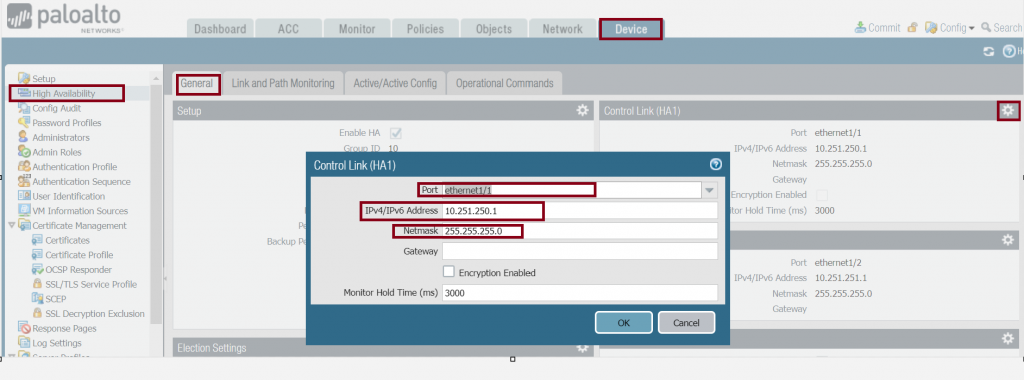
Step 4: Configure HA-01, HA-01 backup, HA-02, and HA-02 backup links on both FWs as follows.
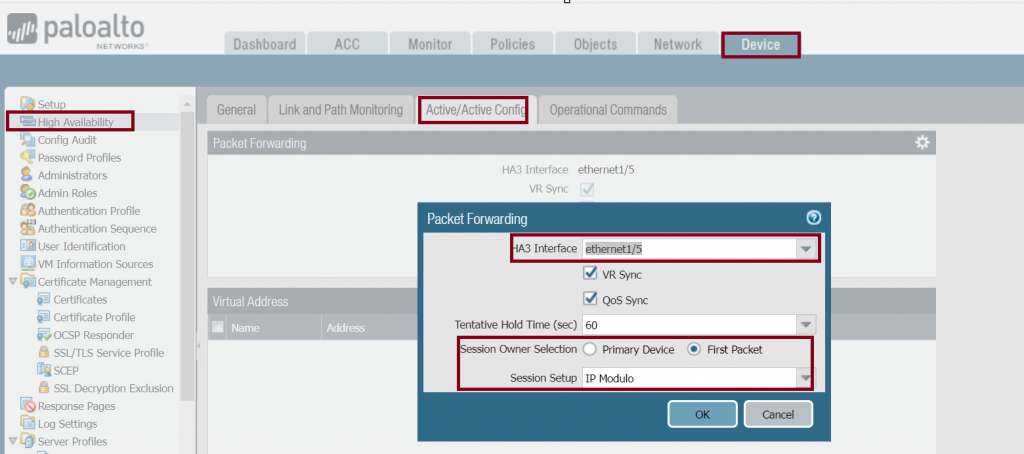
Step 5: Configure HA-03 data link as follows.
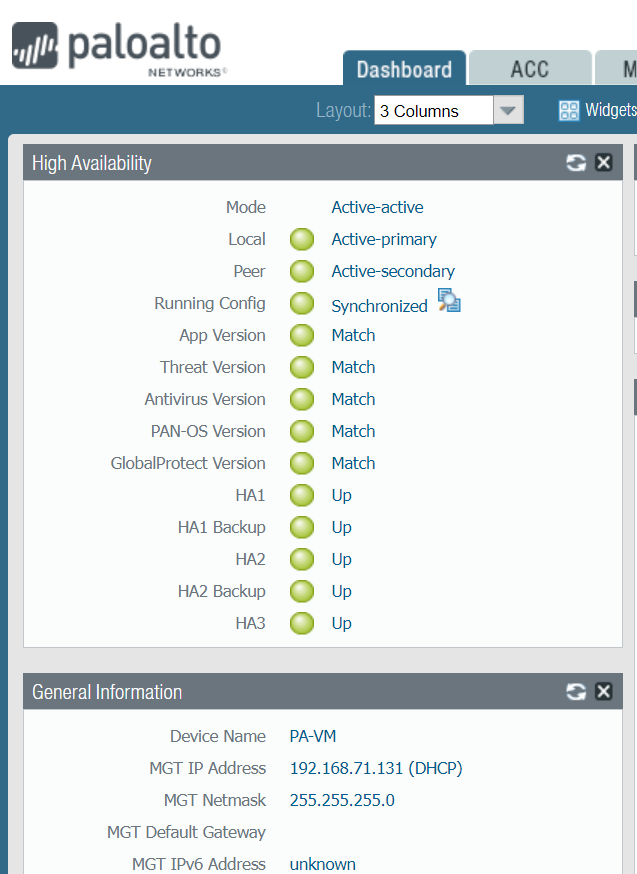
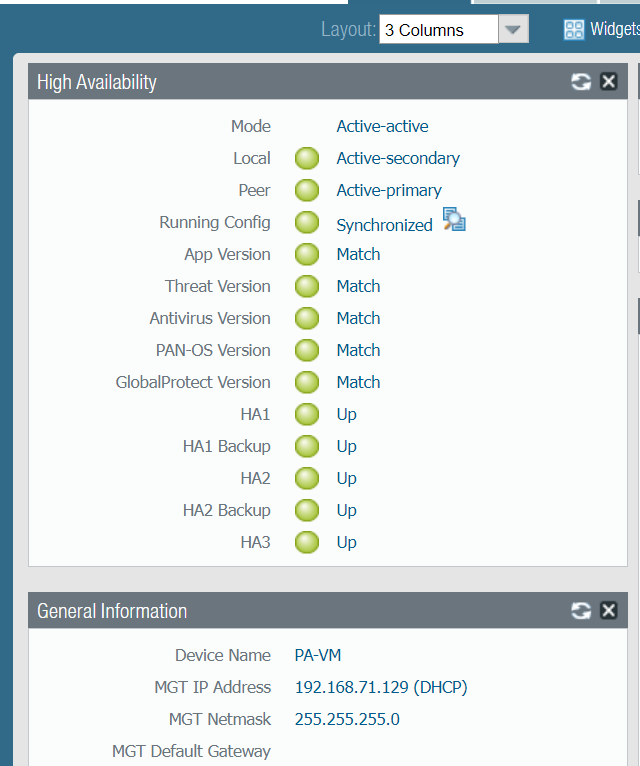
Step 6: Commit the configurations and verify the HA status on both FWs. FW02 is acting as the Active Primary while FW02 is the Active Secondary as shown below.
Thank You for reading our posts. Kindly leave your comments in our comments section below and share our post.
Related Posts
- Step by step guide on how to implement different networking protocols on Juniper MX routers
- L2 EVPN Implementation on Huawei Routers.
- VRRP Monitoring of the Uplink Interface status on Huawei routers.
- Association between VRRP and BFD Implementation on Huawei routers.
- Association between VRRP and STP Implementation on Huawei routers.
Leave a Reply
You must be logged in to post a comment.