
Basic Configuration of Active/Standby on Palo Alto Firewalls
- February 29, 2024
- Posted by: Lyfey Technologies
- Categories: Firewalls, Networking
HA(High Availability) allows you to minimize downtime by making sure that an alternate firewall is available if a peer firewall fails. The firewalls in an HA pair or cluster use dedicated or in-band HA ports on the firewall to synchronize data—network, object, and policy configurations—and to maintain state information.
Palo Alto firewalls support stateful active/passive or active/active high availability.
You can set up the firewalls in an HA pair in one of two modes:
- Active/Passive— One firewall actively manages traffic while the other is synchronized and ready to transition to the active state, should a failure occur. In this mode, both firewalls share the same configuration settings, and one actively manages traffic until a path, link, system, or network failure occurs. When the active firewall fails, the passive firewall transitions to the active state takes over seamlessly, and enforces the same policies to maintain network security. Active/passive HA is supported in the virtual wire, Layer 2, and Layer 3 deployments.
- Active/Active— Both firewalls in the pair are active and processing traffic and work synchronously to handle session setup and session ownership. Both firewalls individually maintain session tables and routing tables and synchronize with each other. Active/active HA is supported in virtual wire and Layer 3 deployments.
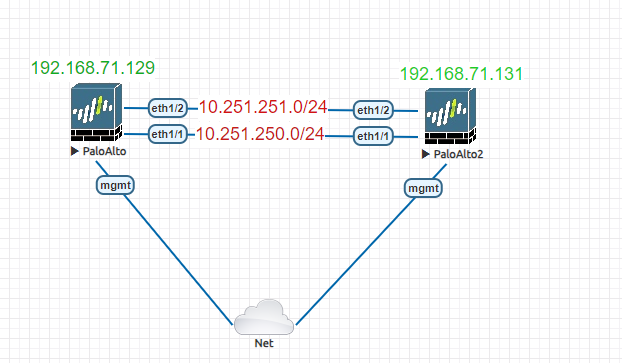
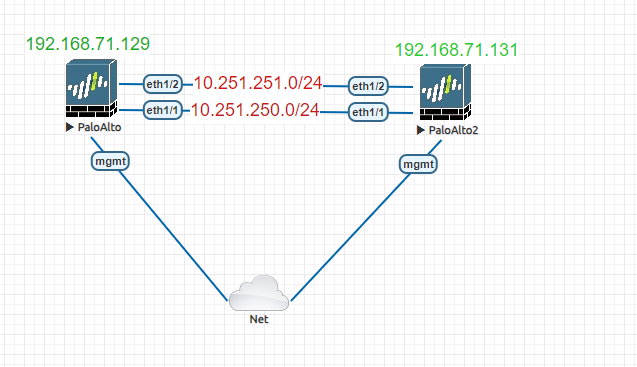
This article demonstrates how to setup two Palo Alto firewalls to work in Active/Passive mode. Below is our topology diagram.
Configuration Step 1: Assign system name, IP address and other parameter to FW01 and FW02
set deviceconfig system hostname PA01
set deviceconfig system type static
set deviceconfig system timezone Africa/Nairob
set deviceconfig system domain lab.local
set deviceconfig system ip-address 192.168.71.129
set deviceconfig system netmask 255.255.255.0
set deviceconfig system default-gateway 192.168.71.128
set deviceconfig system dns-setting servers primary 8.8.8.8
set deviceconfig system dns-setting servers secondary 1.1.1.1
set deviceconfig system hostname PA02
set deviceconfig system type static
set deviceconfig system timezone Africa/Nairob
set deviceconfig system domain lab.local
set deviceconfig system ip-address 192.168.71.131
set deviceconfig system netmask 255.255.255.0
set deviceconfig system default-gateway 192.168.71.128
set deviceconfig system dns-setting servers primary 8.8.8.8
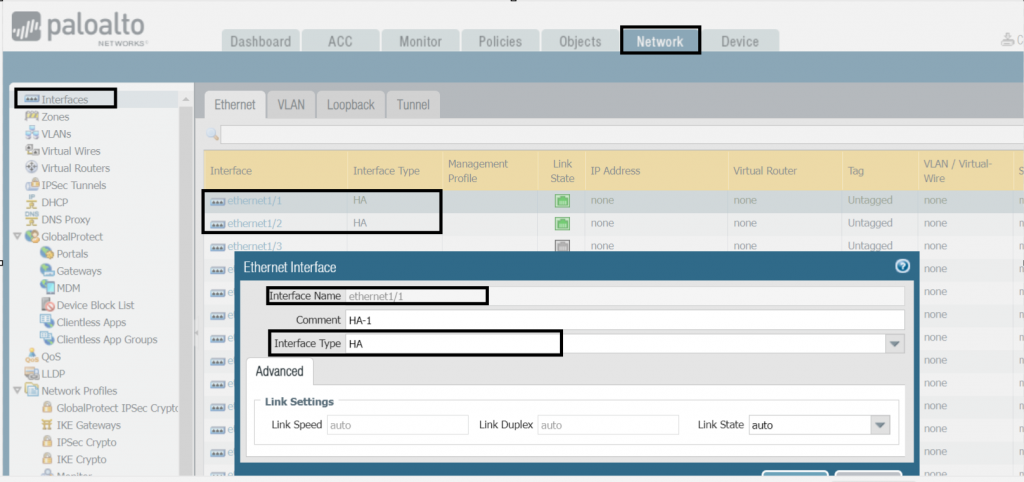
set deviceconfig system dns-setting servers secondary 1.1.1.1Configuration Step 2: Set HA interfaces on both FWs. Go to Network>Interfaces> select Interface and set interface type to HA. Ethernet 1/1 and 1/2 are set as the HA interfaces for our case.
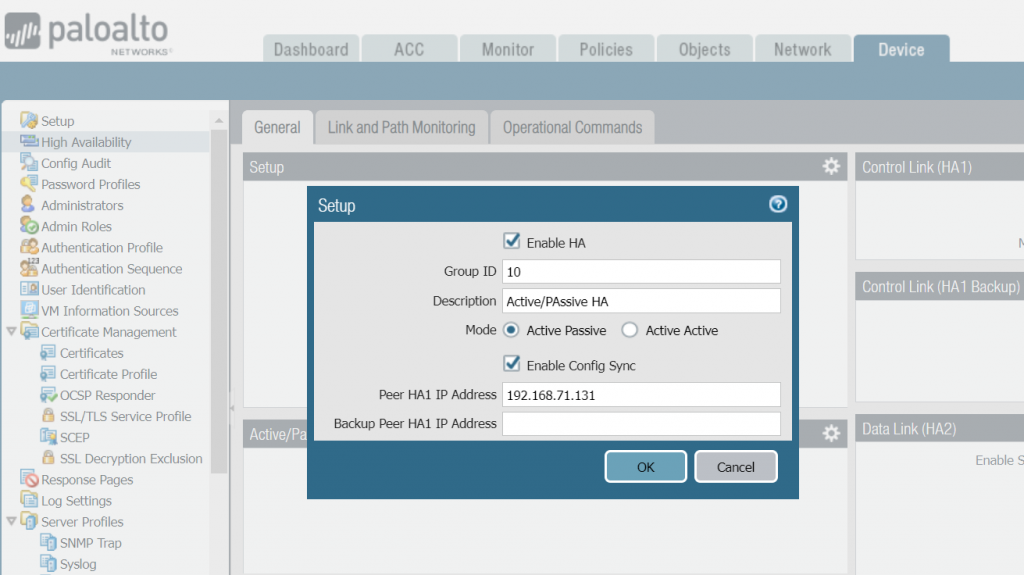
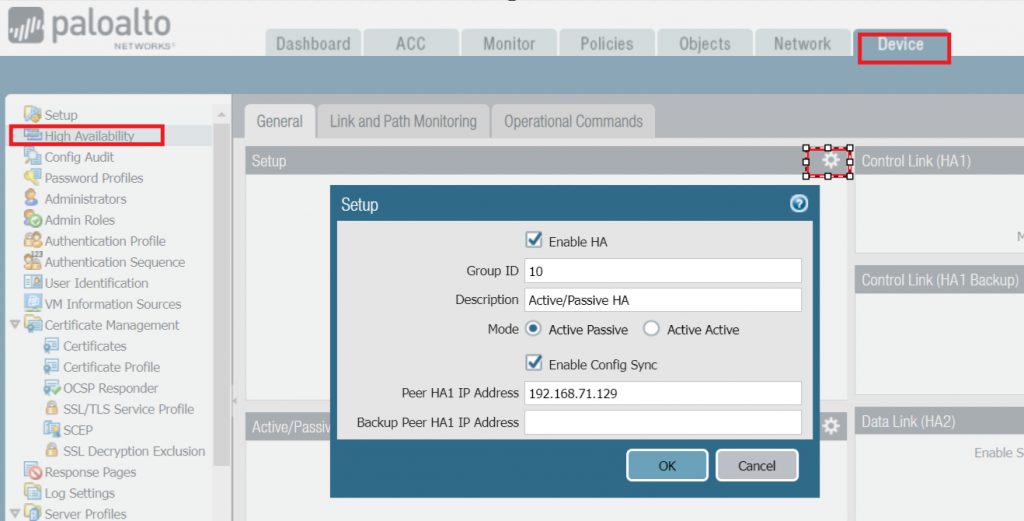
Configuration Step 3: Enable HA on both FWs, Select Active/Passive as the mode and Configure Peer IP address as the IP of the peer FW as shown below. The Group ID should be the same on both routers. 10 is used as the Group ID for our case.
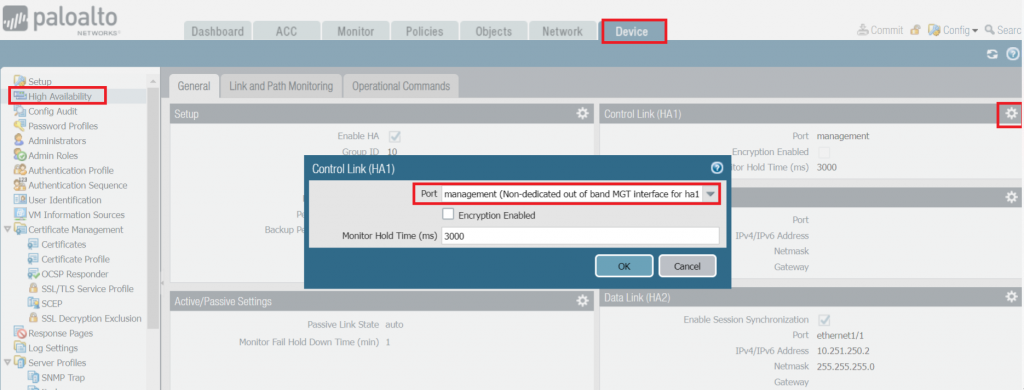
Configuration Step 4: configure HA control links on both FWs as follows.
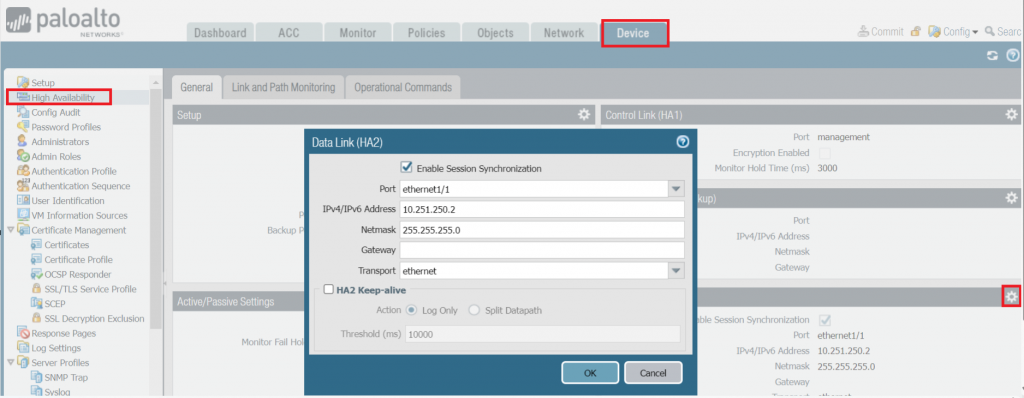
Configuration Step 5: Configure HA Data link connection on both FWs as follows.

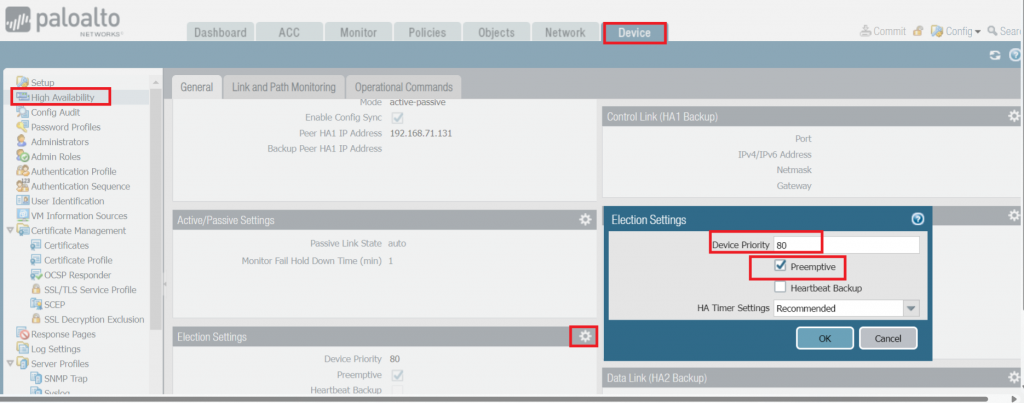
Configuration Step 6: set device priorities and enable Preemption. We set the priority of FW01 to 80 to make it Active. FW02 has the default priority of 100 and will be the Standby.
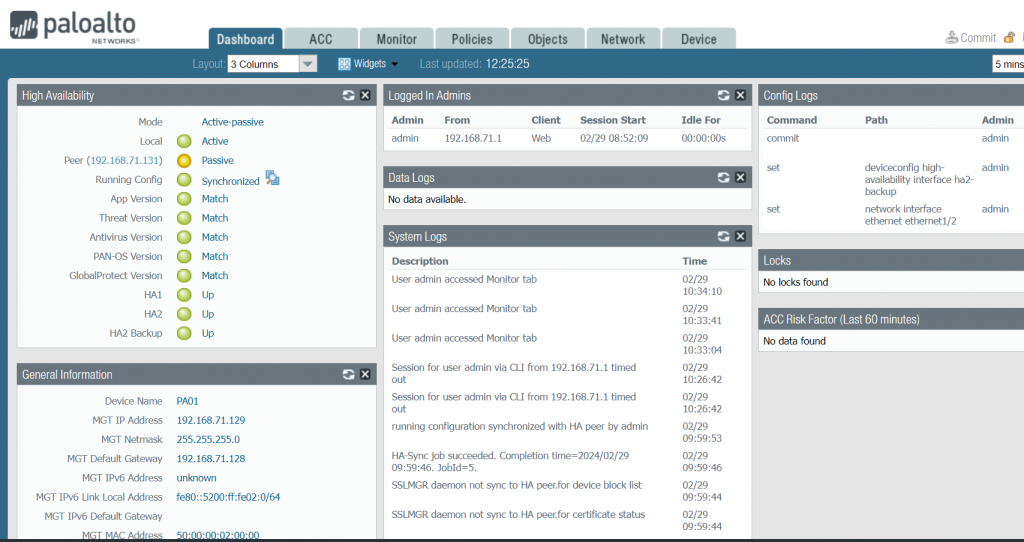
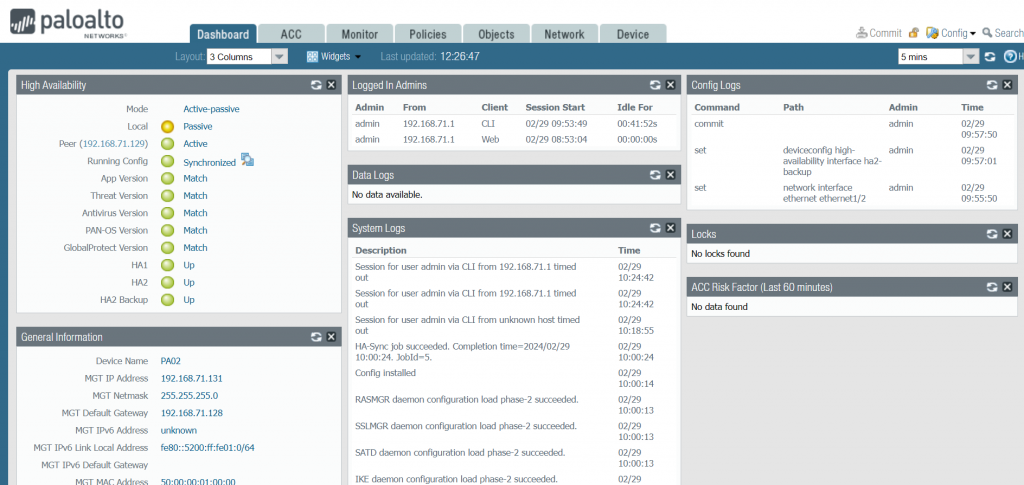
Configuration Step 7: commit and verify HA status on both FWs. The HA status green and our FW01 is the active while FW02 is the Passive
Related Posts
401 Comments
Leave a Reply
You must be logged in to post a comment.
[…] In our last article, we introduced the concept of High Availability(HA) on Palo Alto Firewalls. Check out the article from this link: Palo Alto Active- Passive HA Mode Configuration […]